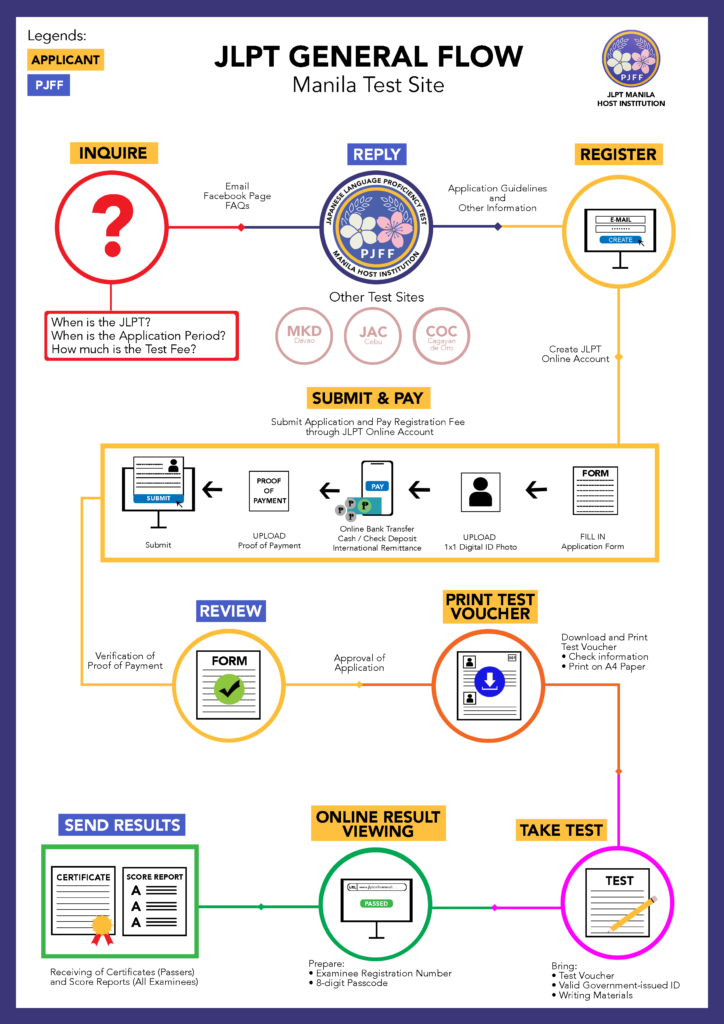
PRE-APPLICATION PERIOD
1. Applicants are to inquire about the JLPT through the different local host institutions. After which, the local host institutions will reply to their inquiries.
APPLICATION PERIOD
2. Once the application period has started, the applicants can create their JLPT account (for new test takers) or verify their account (for old test takers).
3. Then, you are to correctly and completely fill-up the application form.
4. After that, you have to upload a recent 1×1 Digital ID photo.
5. Next, you have to pay the registration fee and upload a clear and complete proof of payment.
6. Applicants can only submit their application once they have accomplished all the other tasks written above.
7. Once the applicants have successfully submitted their application form, the host institution will manually review each submission. Kindly wait for the email.
*Do not send another application.
8. Once your application is approved, you may now print your test voucher in an A4 sized paper. Make sure to double check the information written.
TEST PROPER
9. During the test proper, you need to make sure that you are in the correct venue and brought the needed materials (Test Voucher, Government-issued ID, Writing Materials).
RESULTS
10. After the exam, the online viewing of results will be announced. Make sure that you still have a copy of your registration number and 8-digit passcode to access your results (which can be found in your test voucher).
11. Lastly, receiving of certificates (for passers) and score reports (all examinees) will be mailed by the local host institutions.
This guide is for all JLPT applicants. Detailed guidelines for the Manila Test Site takers will be posted in a later date.
Send us an email if you have concerns and/or inquiries to jlpt.manila@pjff.ph.


